☛ Jump to Cuneiform Writing Techniques in the Ancient Near East


On the wedge’s edge
Writing cuneiform is much easier than you may think… and it’s fun! Mesopotamian scribes started to learn the art of writing already at the age of five, so hurry up...
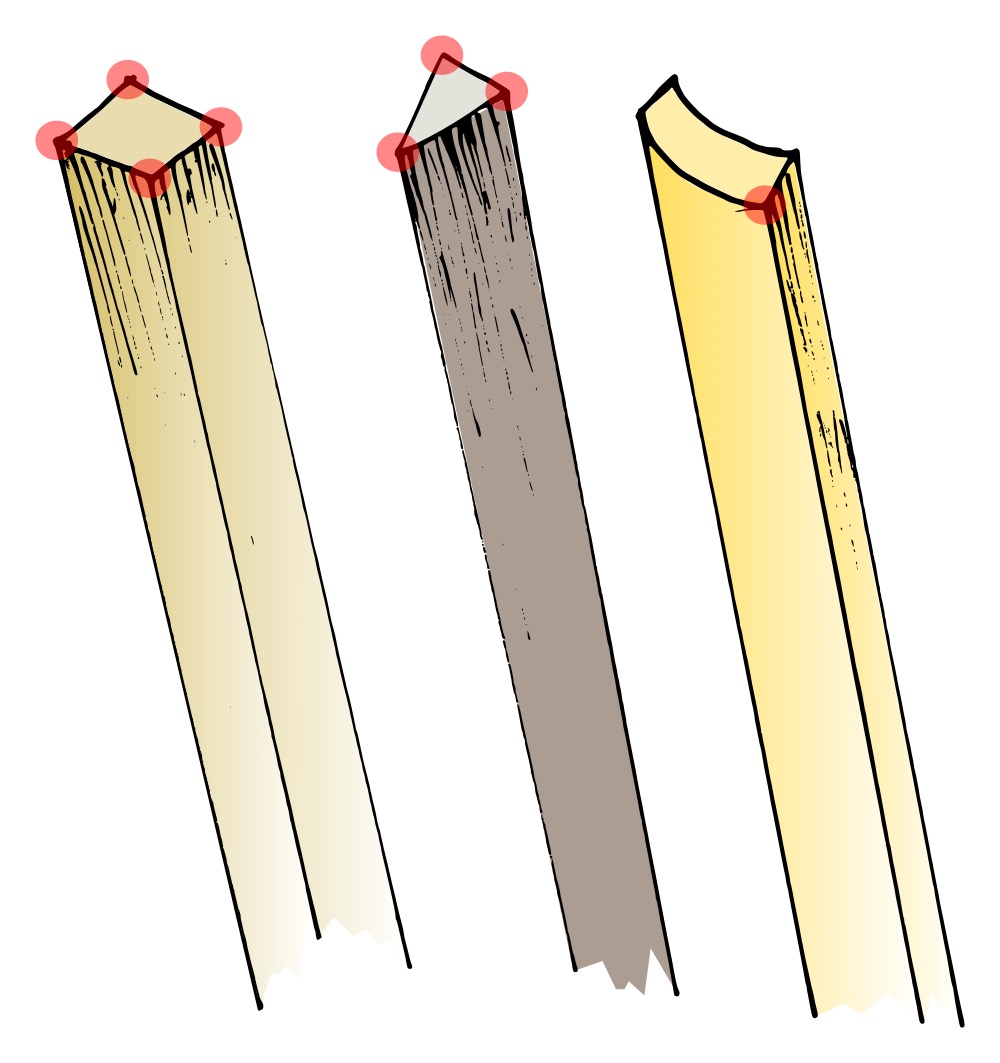
All you need to write cuneiform is clay (or a comparable malleable material), and a stylus with an appropriate corner (strictly speaking, a polyhedral cone, whereby the edges’ angles at the tip will determine the width of the resulting wedges, see fig. 1).
Ordinary chopsticks offer a very easy opportunity to impress beautiful wedges! If instead you want to work exactly like an ancient scribe, using the very kind of stlyus that was customary in Mesopotamia, then you will have to cut a reed stalk in the appropriate way.
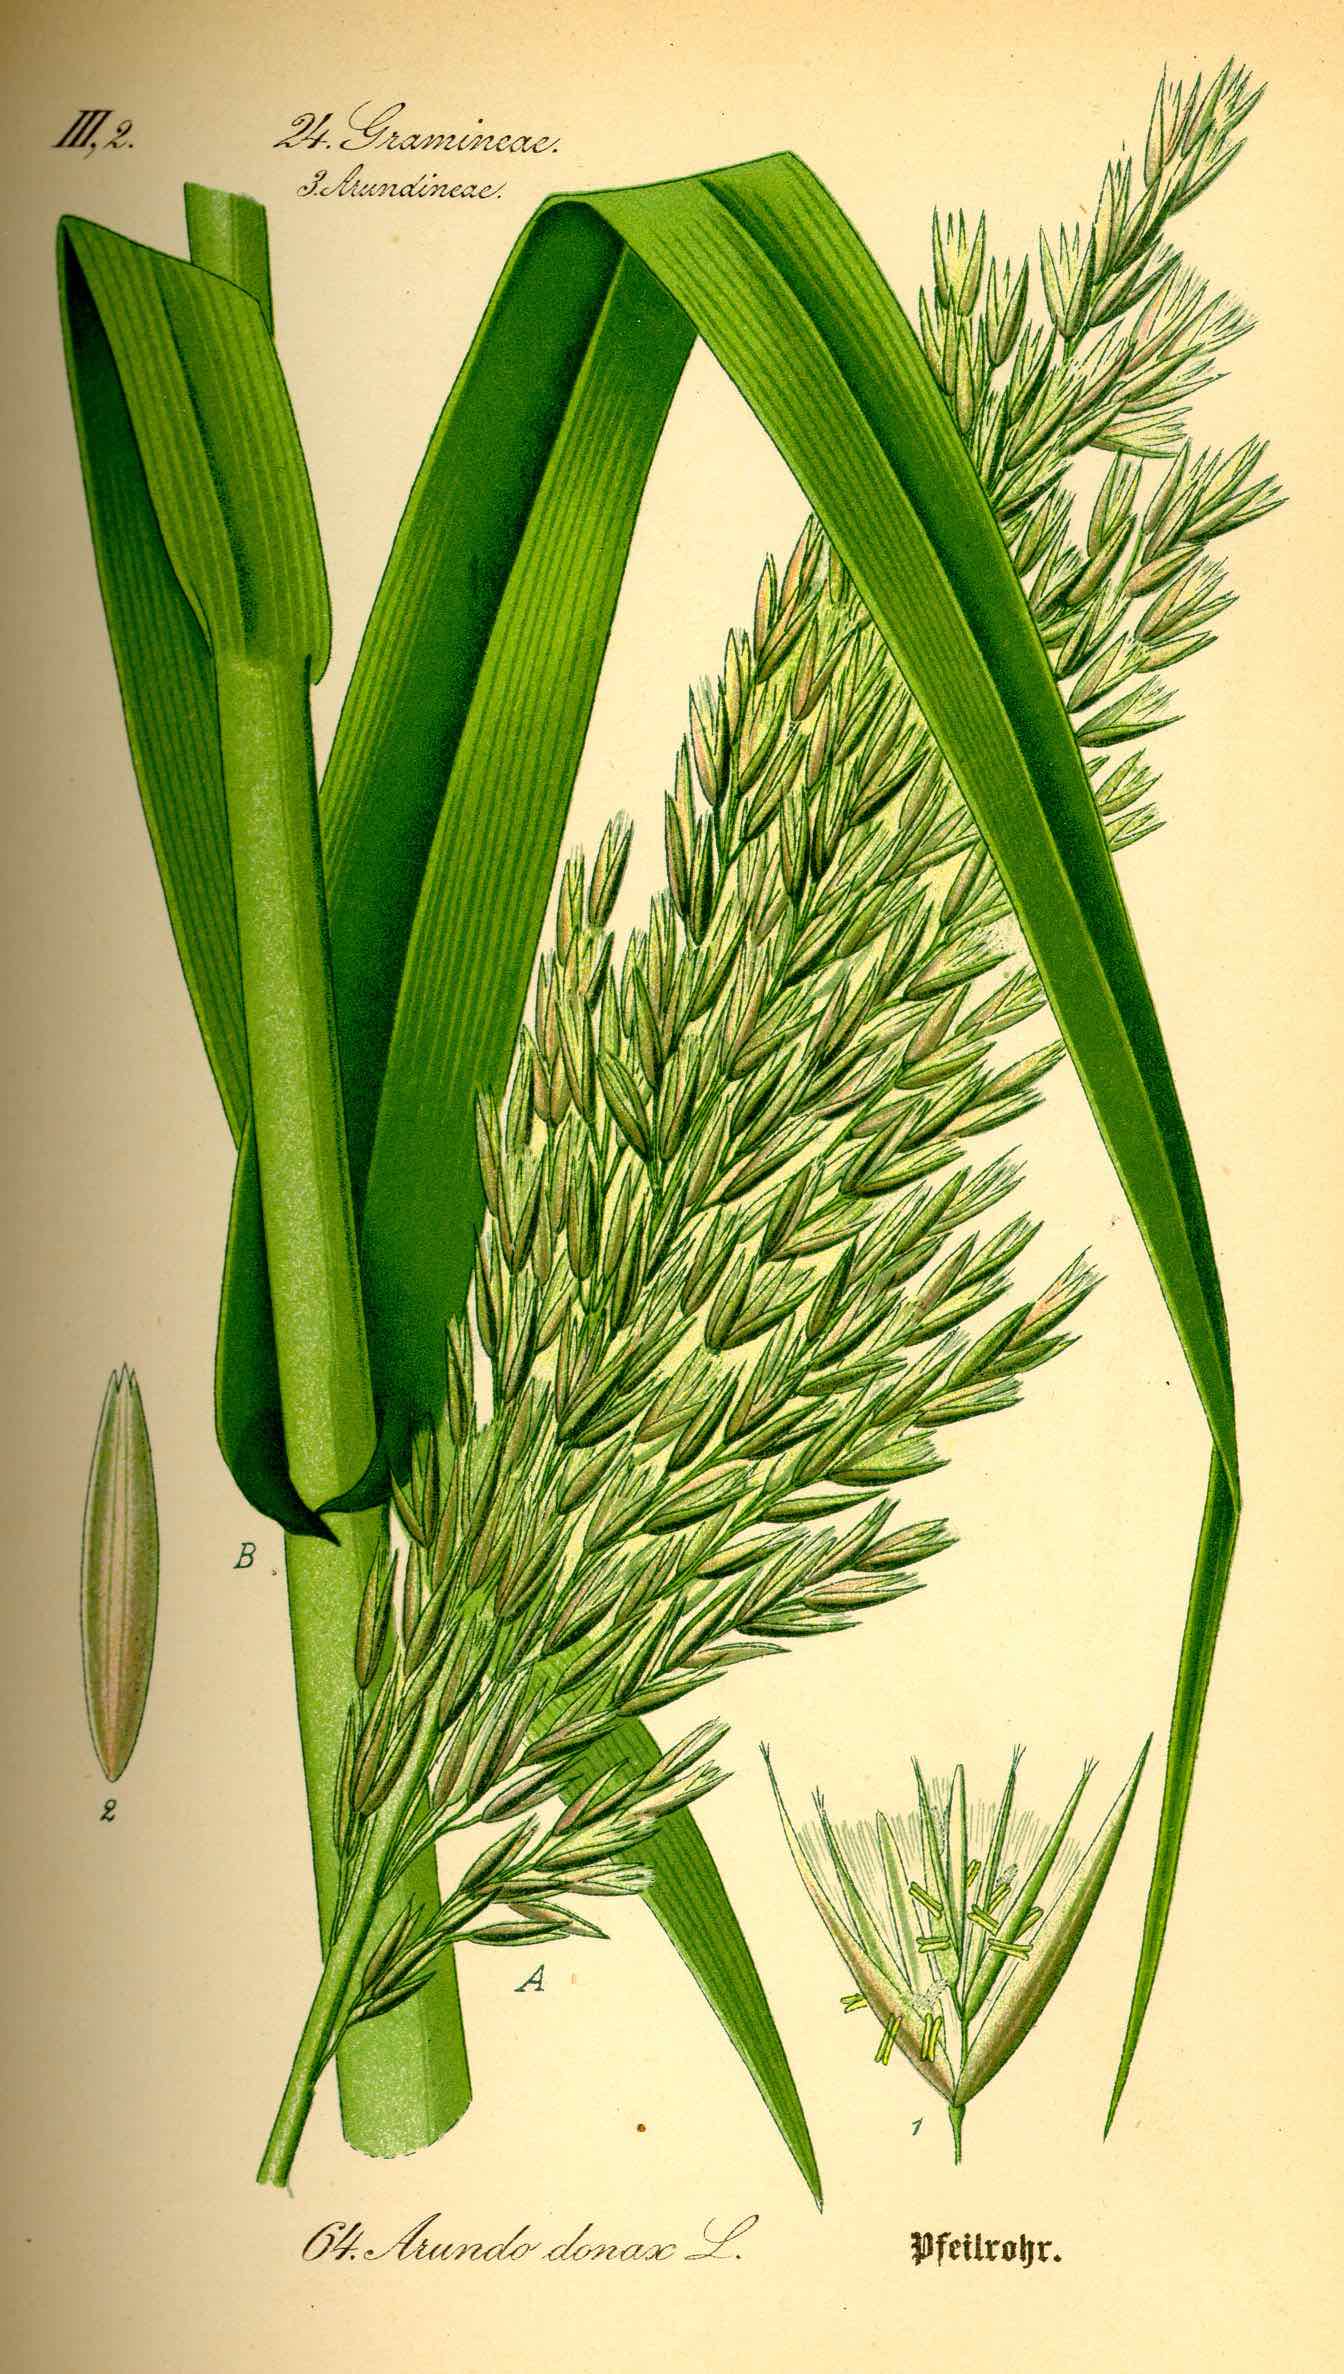
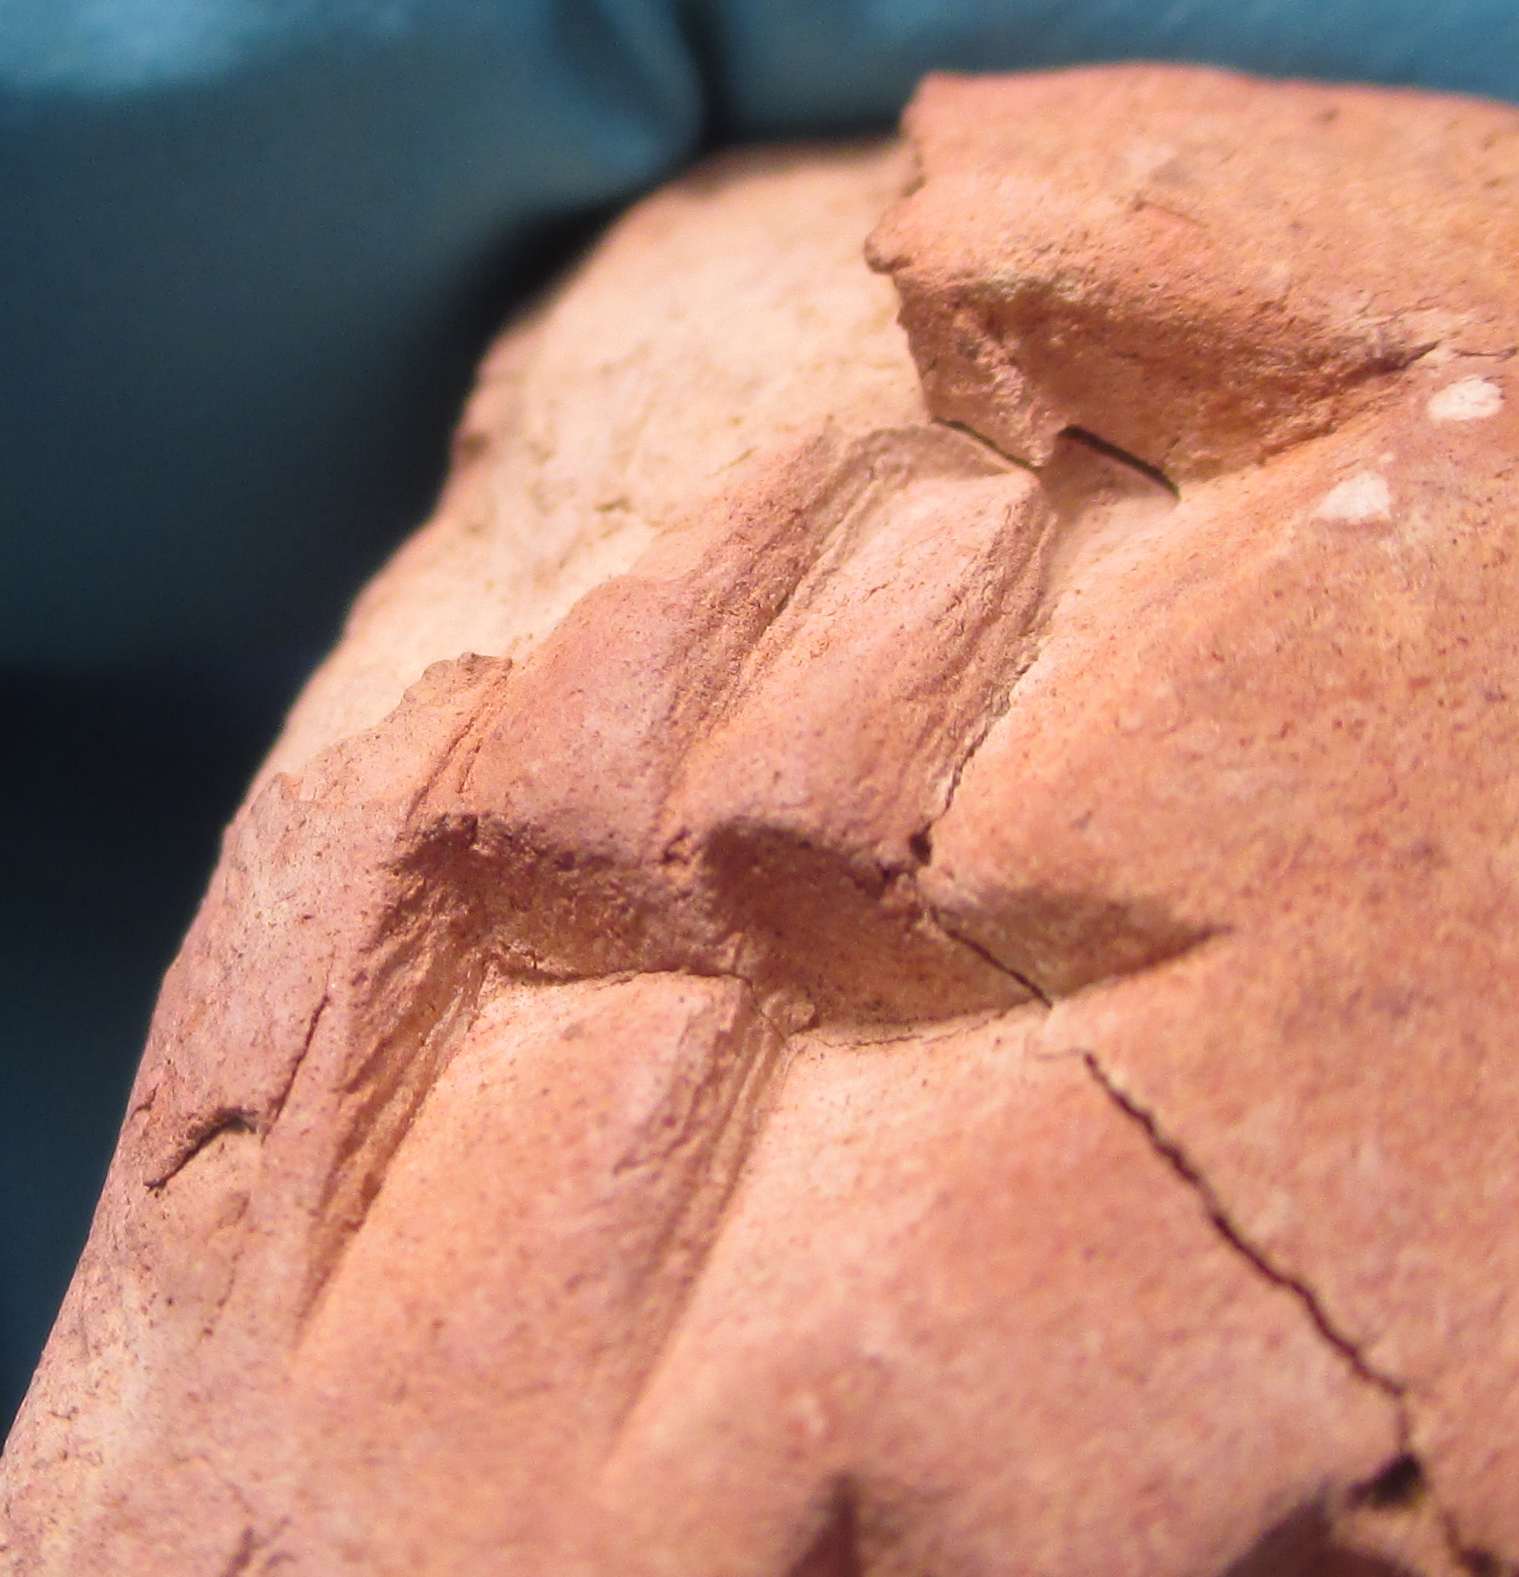
Fig. 3: Close-up showing the typical appearance of a wedge resulting from a reed stylus: the right-hand face is smooth and slightly curved, whereas the left-hand face is flat and displays fibrous impressions (author’s photo).
Two species of reeds were common in ancient Mesopotamia, namely Phragmites australis (which formed the famous marshes still existing in southern Iraq) and Arundo donax (giant reed, fig. 2). Of these, only the second one is suitable to obtain a writing stylus. Giant reed is native to the Mediterranean basin and has been naturalised in the mild temperate, subtropical and tropical regions of both hemispheres. So, if you live in a country like Turkey, Iraq, Spain, or the USA, it won’t be difficult to get a stalk. If not, you may ask the botanical garden of your town, or perhaps use bamboo, which however is much harder to cut!
Close observation of original tablets shows that the ancient scribes coherently handled the stylus in such a way that the stylus’ face consisting of the reed’s glossy outer skin produces the smooth, slightly curved right-hand face of the wedge, whereas the left-hand face of the wedge results from the stylus’ face corresponding to the cut-off inner part of the stalk (fig. 3). The reason for this was probably the willingness to optimize the use of the waterproof, non-sticking skin of the reed, since the right-face of the wedge is normally larger than the other ones.
There is no uniqe way of properly cutting the reed, but rather multiple possibilities that are all equally suitable. Note, however, that Mesopotamian scribes used only certain corners of the stylus to write (fig. 4).
The crucial aspect to consider is that the stylus will have to be dropped into the wet clay in such a way that its curved face produces the right-hand face of the wedge (fig. 5). The angle at which you cut the stalk will determine the width (or “aperture angle”) of the resulting wedges. There is no “correct” or “uncorrect” angle, since this feature varied across the different periods and scribal traditions of the Ancient Near East.
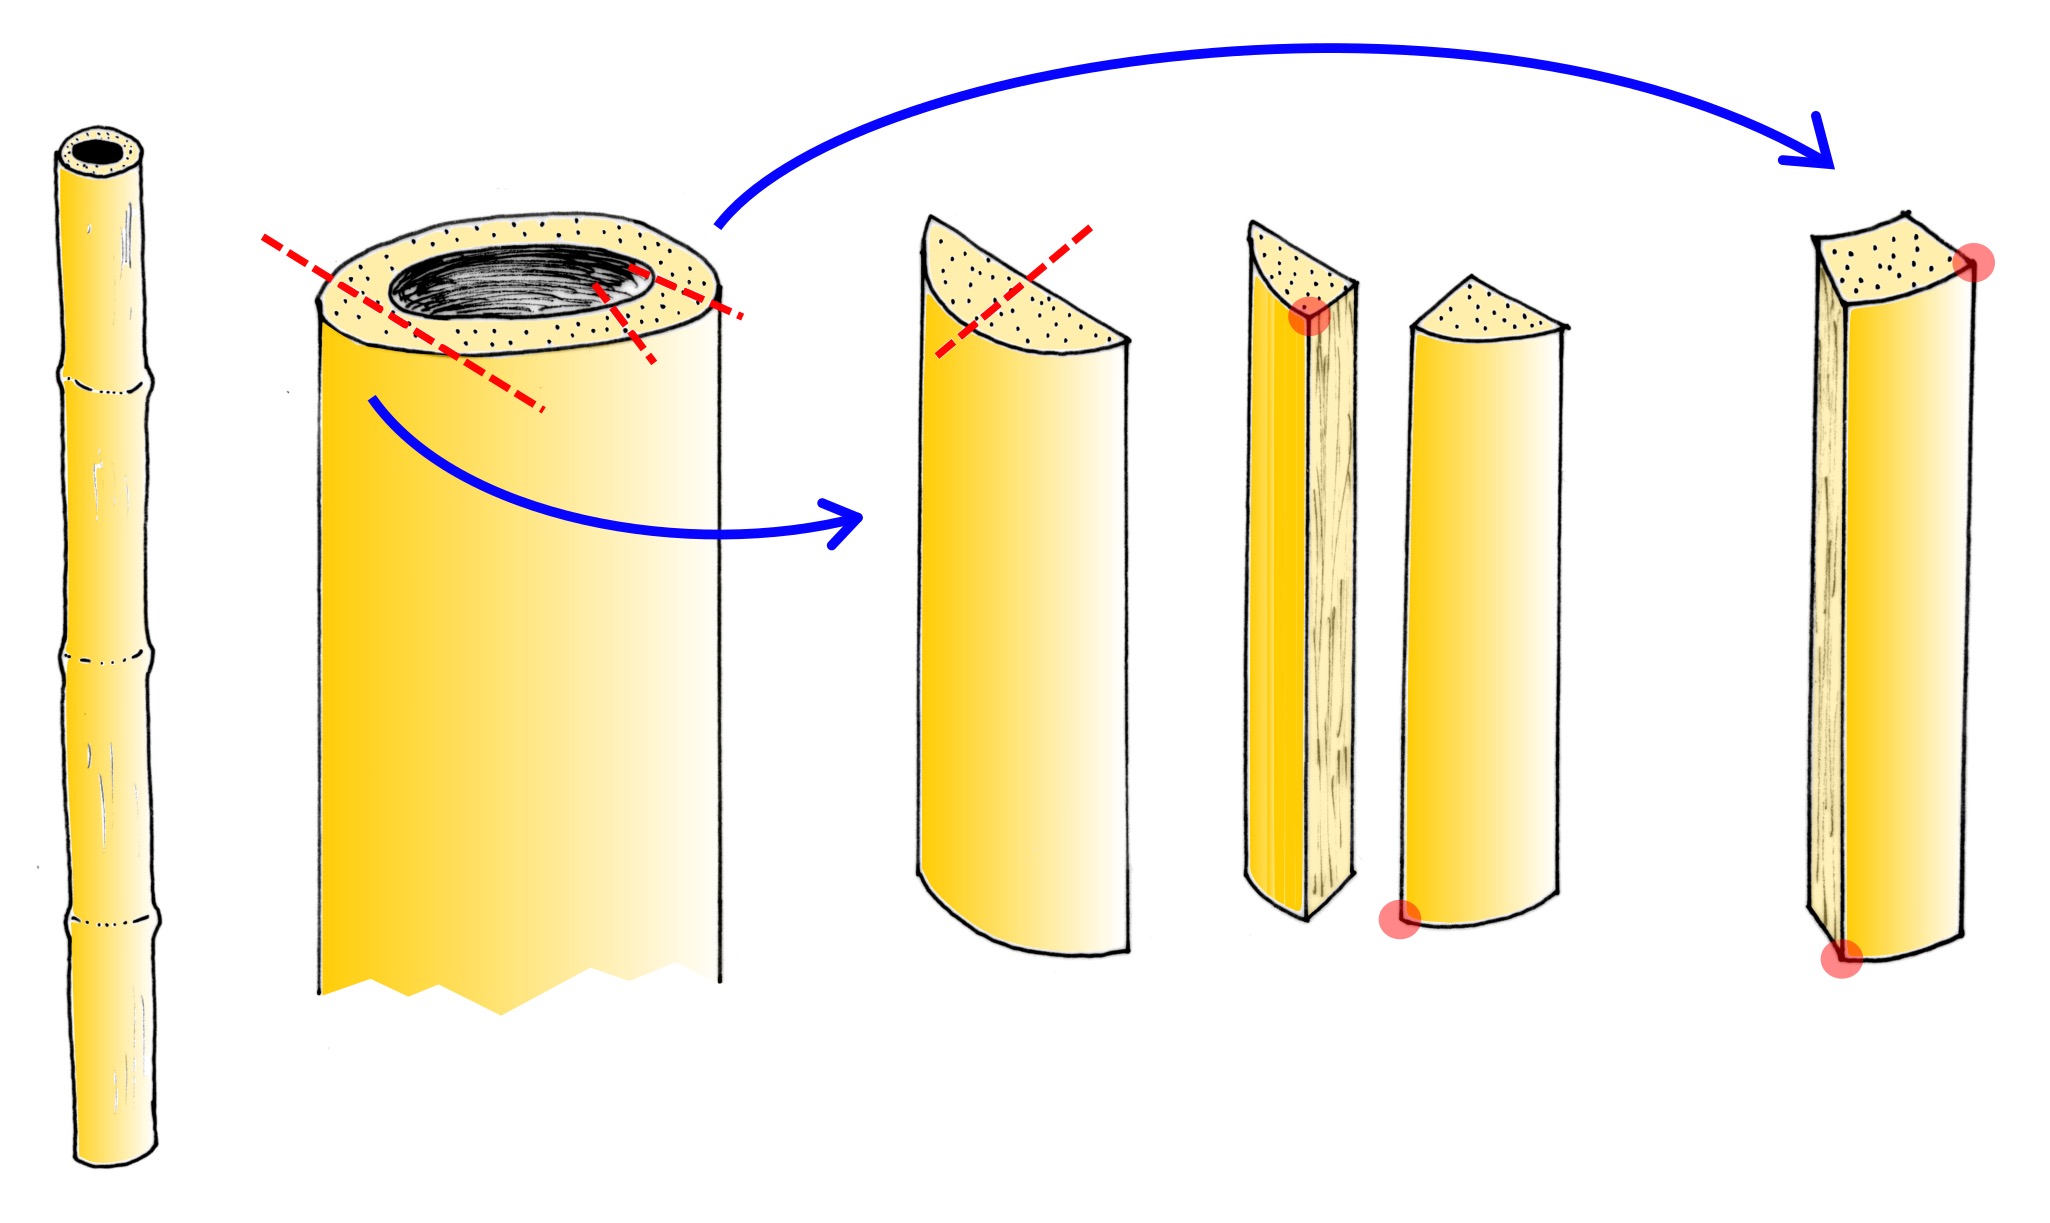
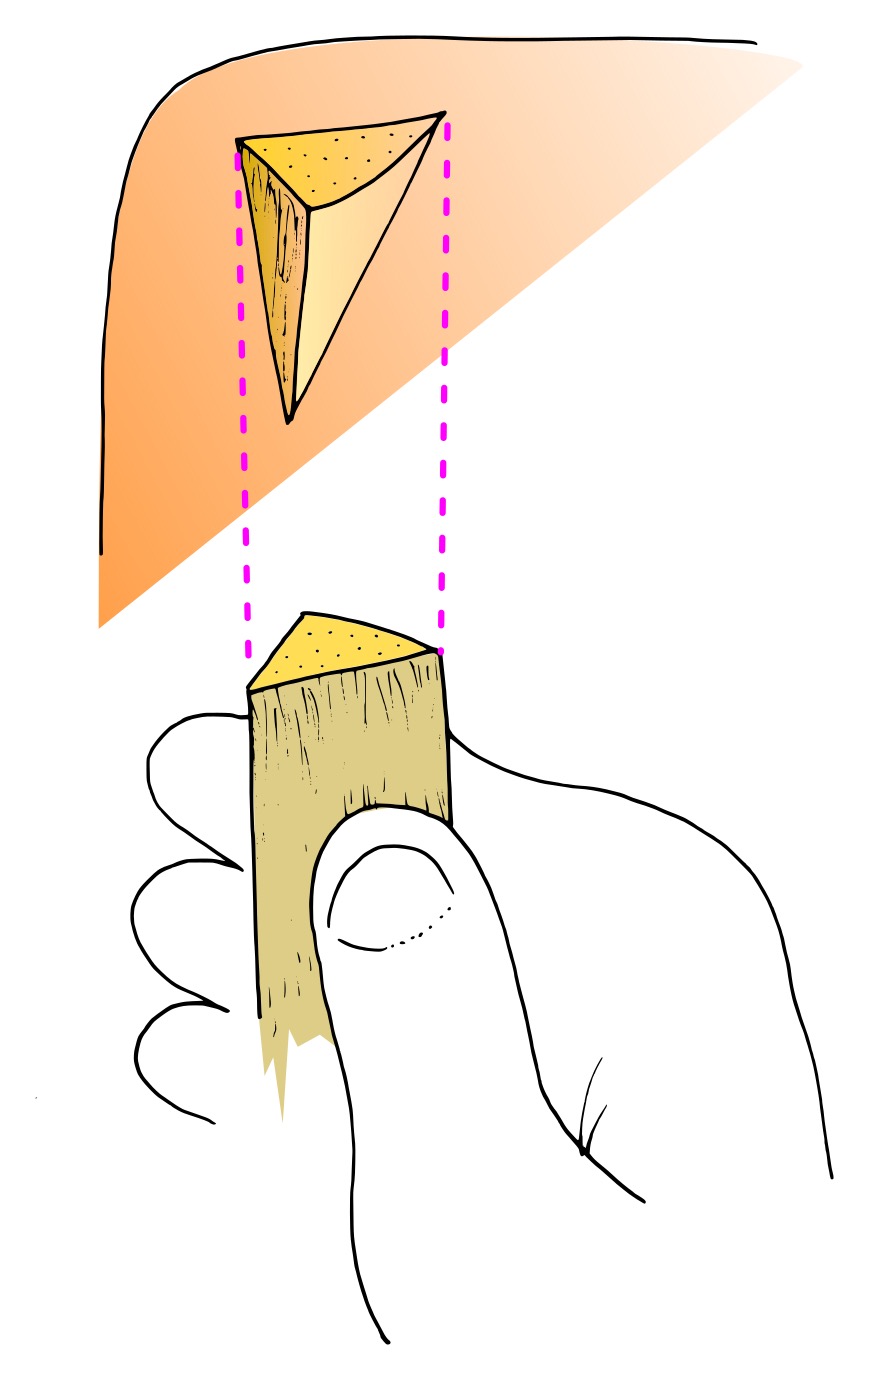
Fig. 5 (right): Schematical representation of the handling of a reed stylus.
All you need is clay ♫
To form a clay tablet is much like kneading a pizza dough – best of all, follow this 4000 year-old Sumerian recipe:
“Quick, come here, take the clay, knead it, flatten it, mix it, roll it like a ball, make it thick, make the tablet!”
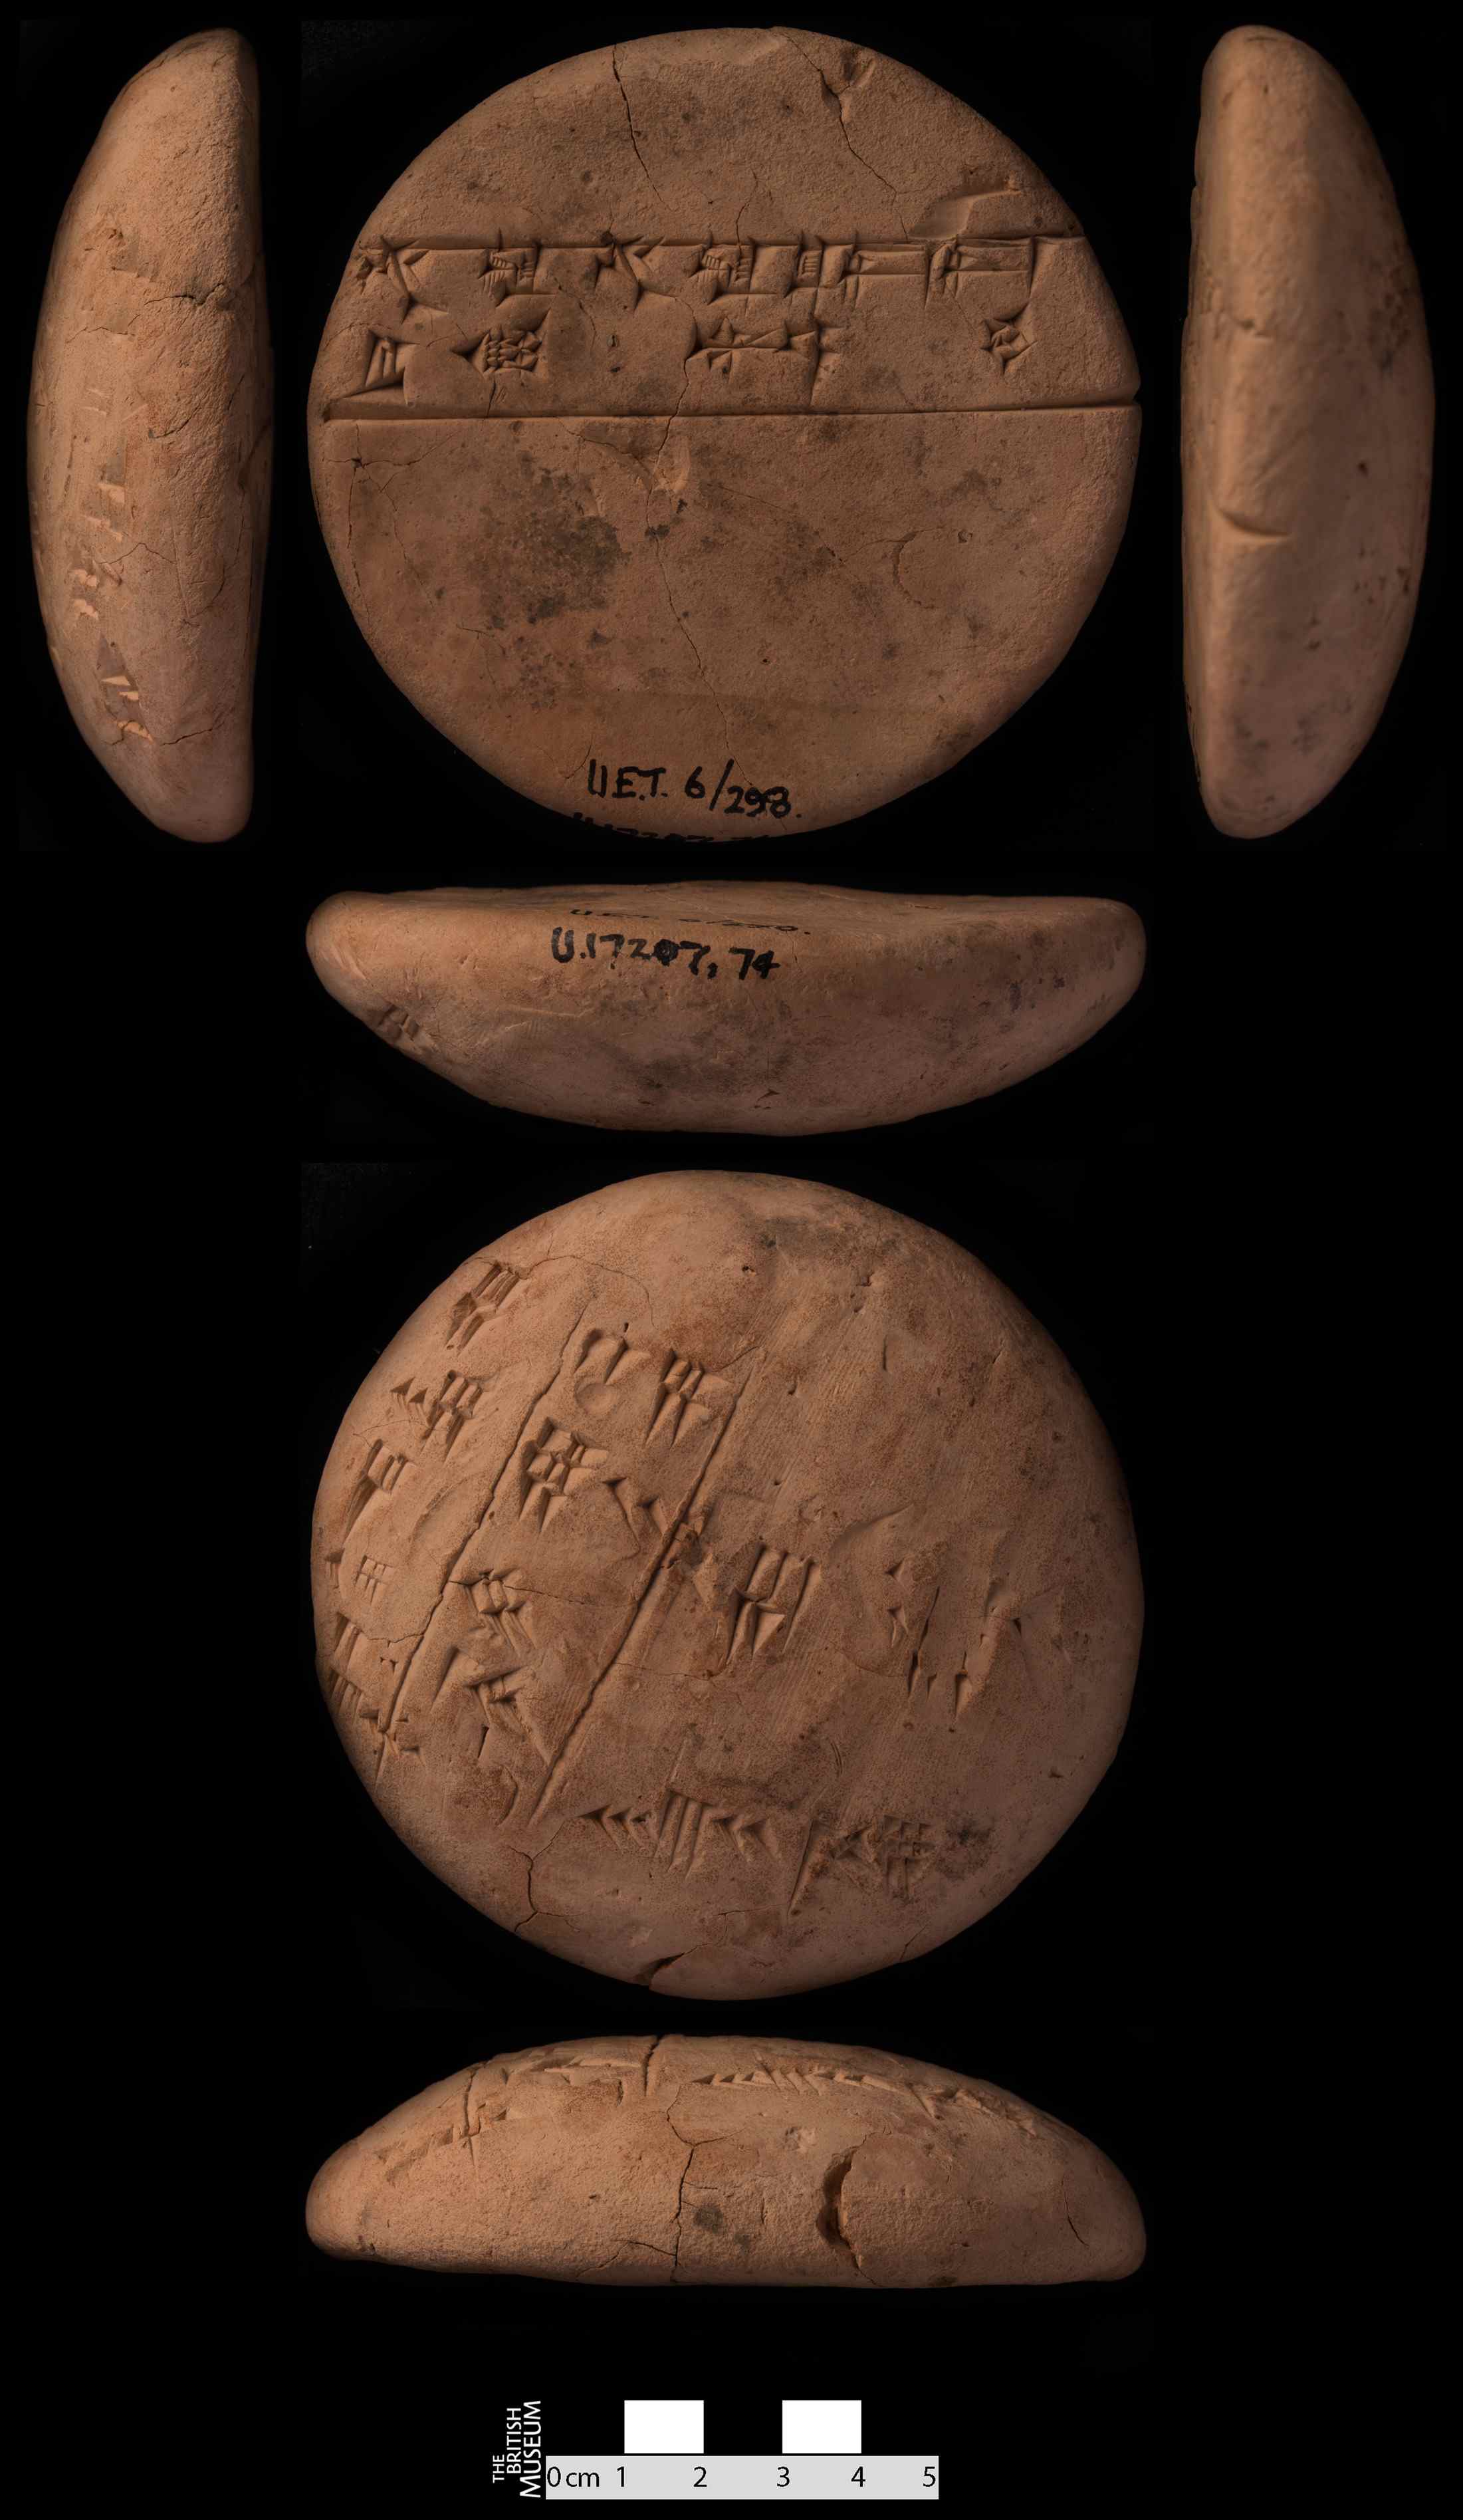
Sometimes, inspection of the inner structure of a tablet reveals a complex process consisting of repeated folding and rolling of separate sheets of clay, a bit like for the preparation of puff pastry. The quality of clay which was used for tablets in ancient times was variable, depending on the available raw material, the way it was processed, and also the text genre – tablets of administrative and ephemeral character are often of coarse clay, while finer clay was used e.g. for those meant for the royal library. Also the shape of the tablets varied a lot, depending on genre and scribal tradition. Usually, schoolboys formed small tablets shaped as a lentil (so-called lentil tablets), which can be hold in the palm of hand and are very suited for practicing (fig. 6).
Finally, start writing: it’s simply a matter of pressing the stylus’ corner into the moist clay, the signs consisting of combinations of wedges and each wedge being obtained through a separate impression.
There are three basic types of wedges: vertical, horizontal, and oblique; additionally, the Winkelhaken or “corner wedge” represents the head of an oblique wedge. To pass from one type to another and to determine the wedge’s length is all a matter of varying the stylus’ orientation to the tablet and the angle at which it meets the surface. The main edge of the stylus, which is dropped in the clay, will always correspond to the main axis of the wedge, i.e. the stylus has to be rotated 90° when passing from a vertical to a horizontal wedge and vice versa.
The best way to start practicing cuneiform is to follow the curriculum of the ancient scribes: first try to impress series of verticals, horizontals and Winkelhaken, then turn to proper signs.
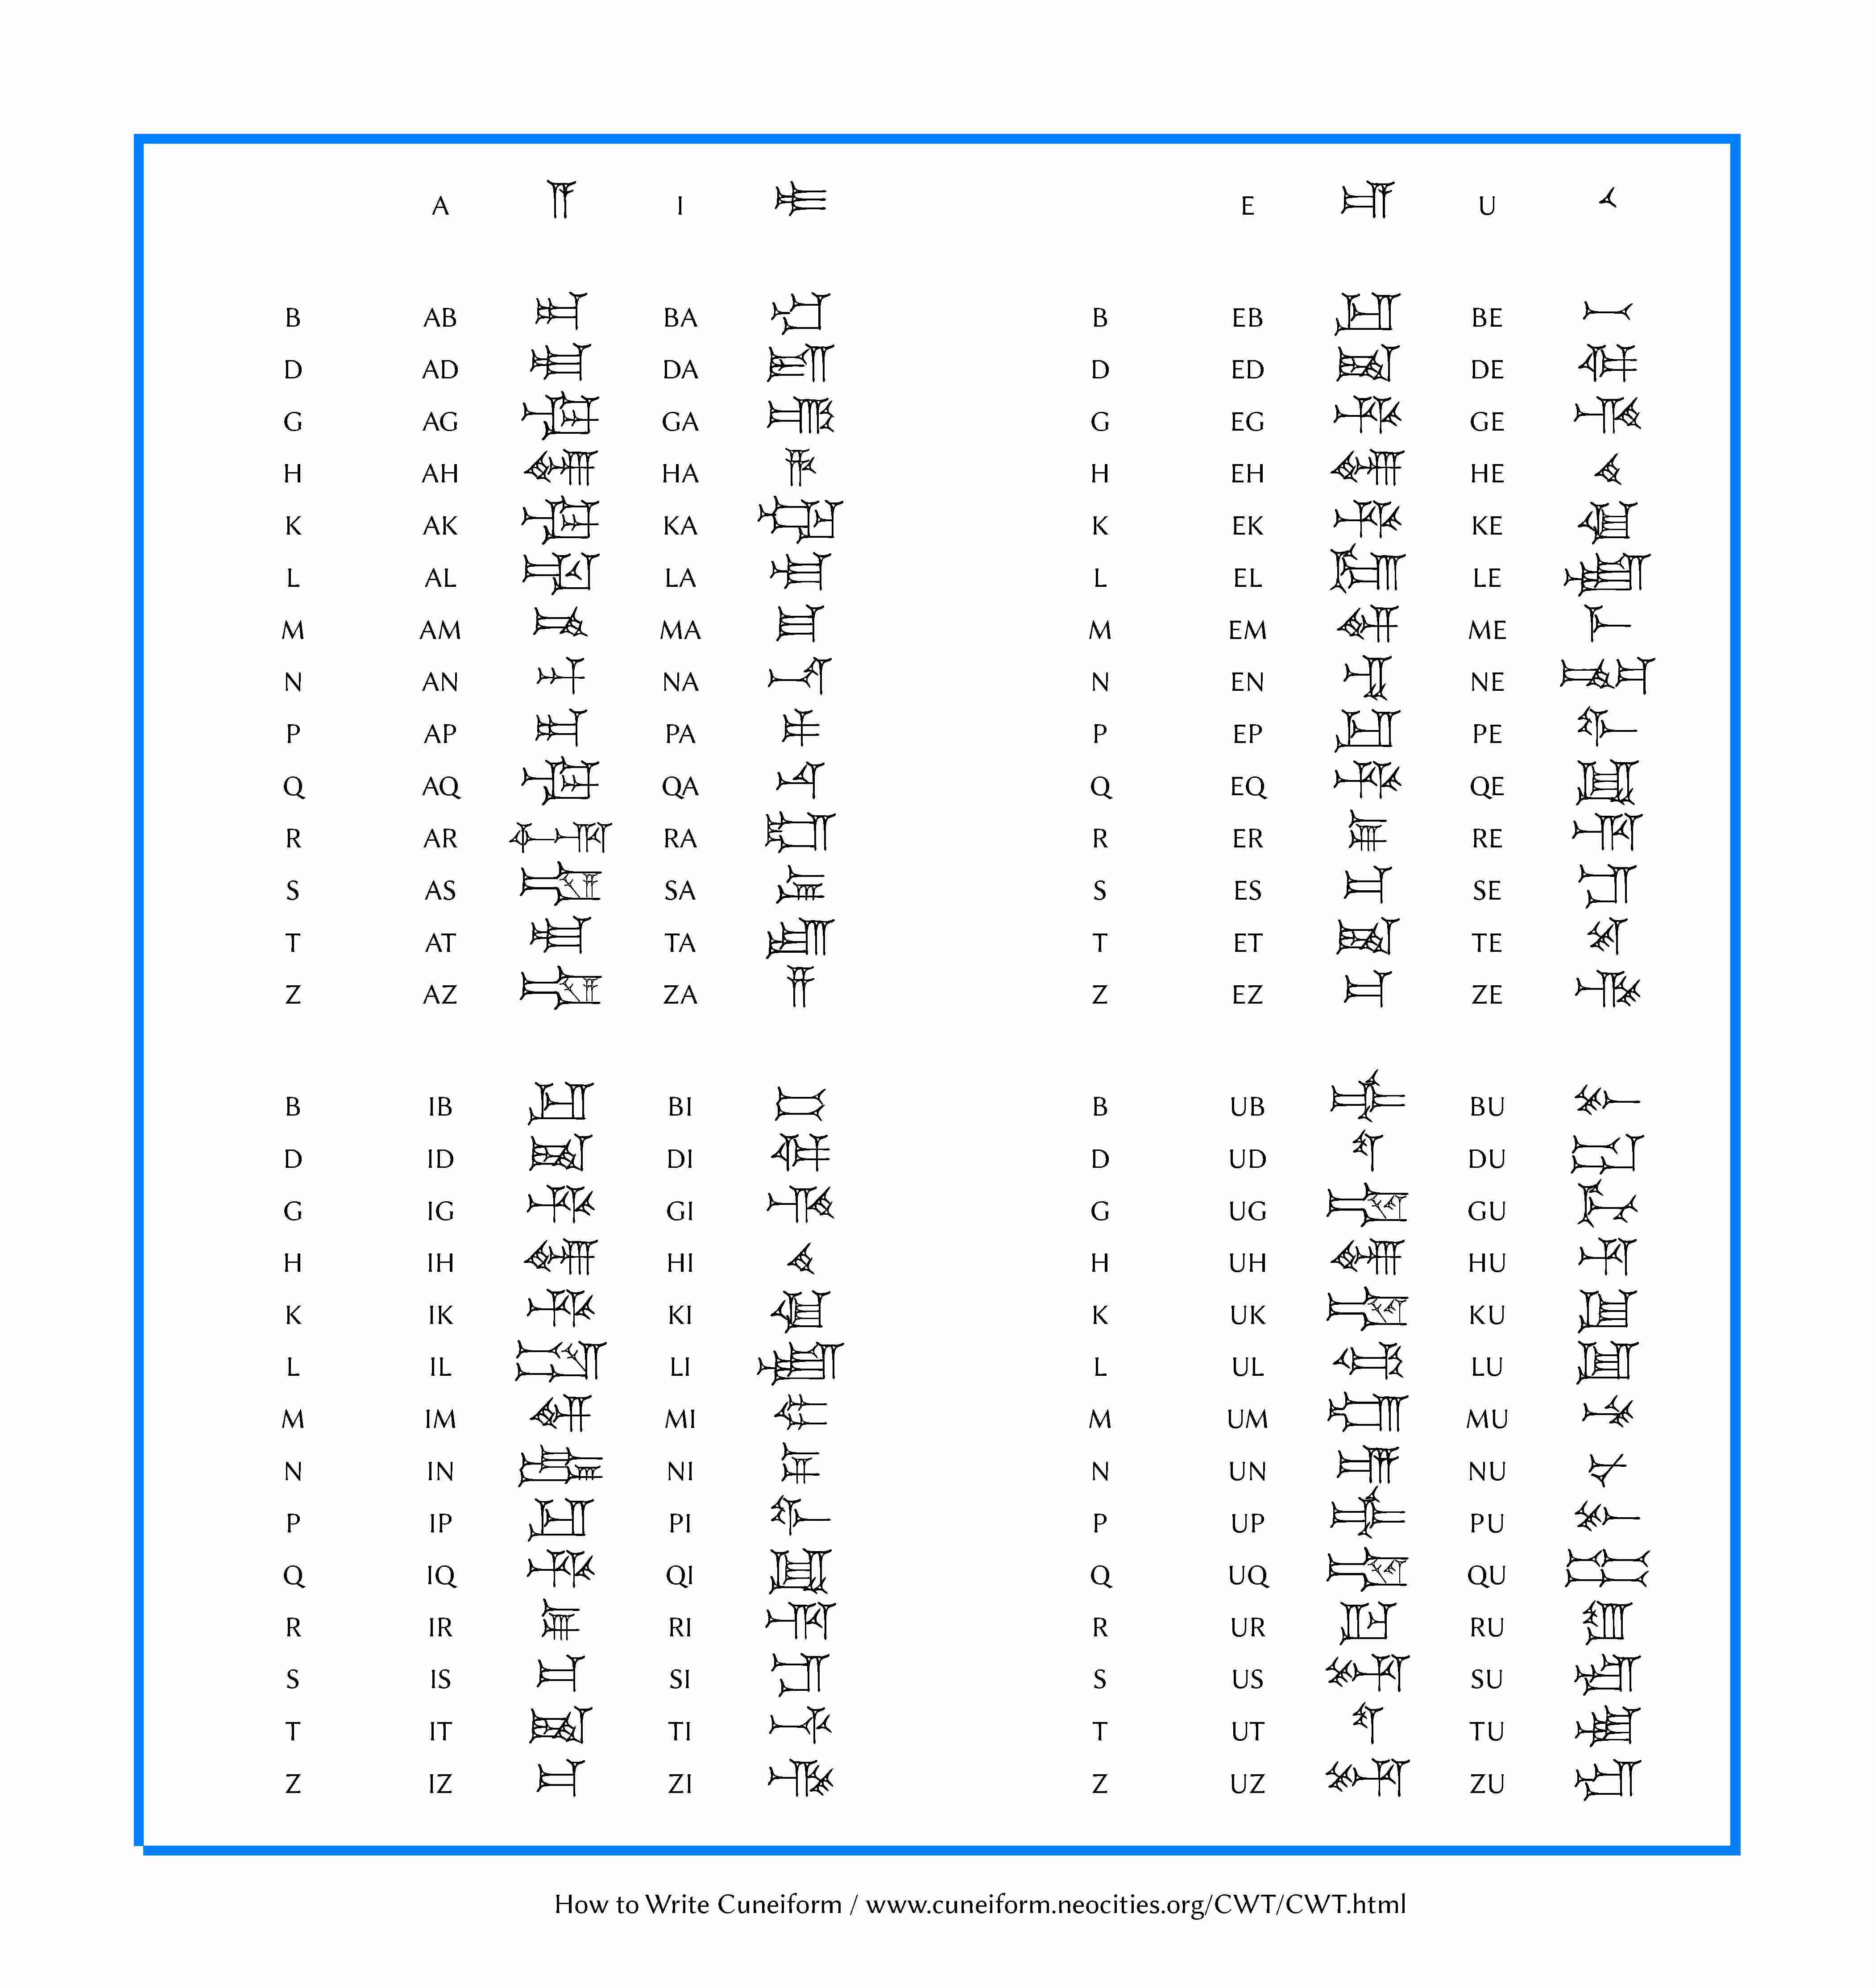
Those who are not accustomed with the complexity of Assyriological sillabaries (counting up to thousands of signs) will find useful to look at simple charts of selected signs, arranged according to one’s native alphabetical order (fig. 7). Sign charts arranged after the Latin and Arabic alphabets can be found here; other are available e.g. at this page (by C. Michel) or at pages 102-103 of the book Cuneiform by I. Finkel & J. Taylor.
Nice introductions and tutorials are also available on YouTube – among my favorite ones are “Irving Finkel Teaches Us Cuneiform” (with Irving Finkel, curator of the cuneiform tablet collection at the British Museum) and “Scribes in Mesopotamia” by Theo van den Hout of the Oriental Institute, Chicago.
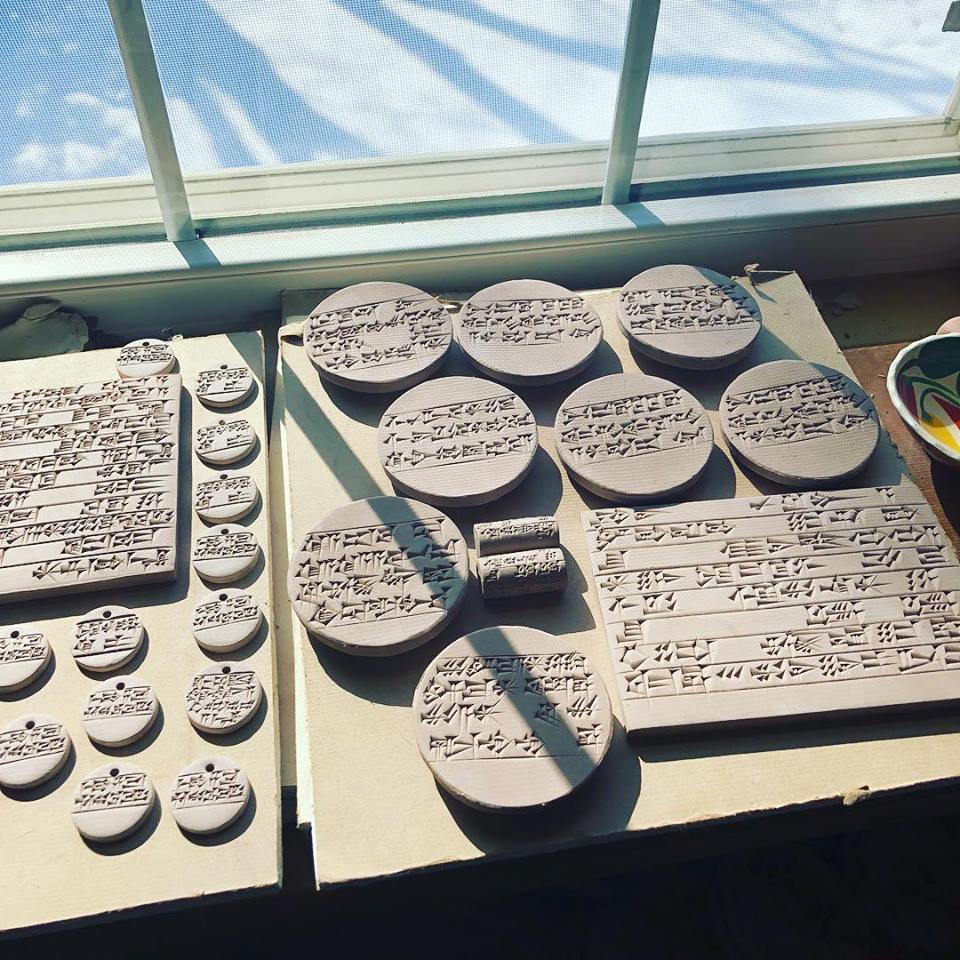
With a bit of exercise, you will be able to produce beautiful... fakes, as exemplified excellently by the work of Jeremiah Peterson, “ceramic calligrapher”, and many others (fig. 8).
... Enjoy!
Further readings
- L. Messerschmidt, “Zur Technik des Tontafel-Schreibens”, OLZ 9, 1906, 185-196, 304-312, 372-380
- M. Cammarosano, “The Cuneiform Stylus”, Mesopotamia XLIX, 2014, 53-90
- A. Bramanti, “The Cuneiform Stylus. Some Addenda”, CDLN 2015/12
- E. Devecchi, G. Müller, and J. Mynářová (eds.), Current Research in Cuneiform Palaeography, Gladbeck 2015
- Cuneiform on Wax project webpage, JMU Würzburg
- J. Taylor, “The Making and Re-Making of Clay Tablets”, Scienze dell’Antichità 17, 2012, 297-324
- M. Cammarosano, K. Weirauch, F. Maruhn, G. Jendritzki, P. Kohl, “They Wrote on Wax. Wax Boards in the Ancient Near East”, Mesopotamia LIV (2019), 121-180